
Sewing darts into a bodice is a fundamental skill for achieving a flattering fit in garments. Darts help to shape the fabric around the curves of the body, ensuring that the bodice conforms neatly to the wearer’s torso.

This guide will walk you through how to sew darts in a bodice, from marking and pinning to stitching and pressing, so you can create beautifully fitted tops and dresses with professional precision.
Whether you’re a beginner or an experienced sewer, mastering the art of sewing darts is a step toward elevating your sewing projects.
How to Sew Darts in A Bodice
Sewing darts into a bodice is like adding the final touches that make your garment fit just right. Let’s walk through each step to make sure those darts look sharp and professional.
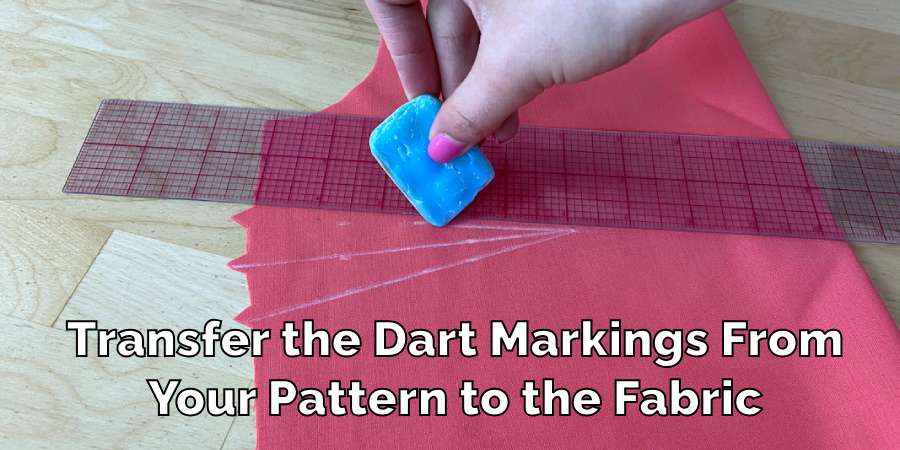
Mark Your Darts
The first thing you need to do is transfer the dart markings from your sewing pattern onto your fabric. You’ve got a few options for how to do this, like using tailor’s chalk, a fabric marker, tailor’s tacks, or even carbon paper with a tracing wheel.
Pick what feels best for you and your fabric, but make sure those markings are accurate. Think of it like using a stud finder before you hang a shelf – you want to make sure you’re hitting the right spot.
Pin the Dart
Start by sticking a pin at the end point of the dart, which is usually the narrowest part, close to where the body curves the most, like the bust or waist.
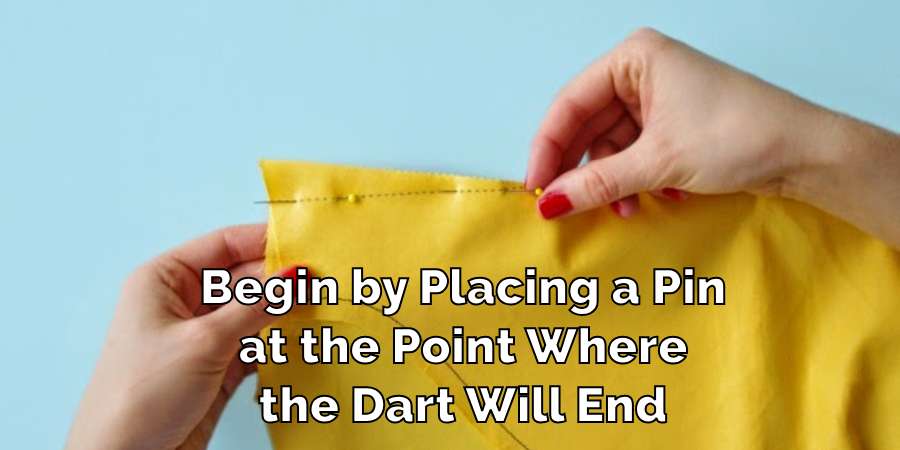
Then, line up the marked lines on both fabric sides with more pins, making sure everything lays flat and matches up perfectly. This step is key to avoiding any weird twists or mismatches in your dart.
Sewing without Puckering
Now, you’re ready to sew. Begin at the wider end of the dart (that’s usually at the garment’s edge) and work your way towards the dart point. Keep your stitch length normal at first, but as you get closer to the end, start making those stitches shorter.
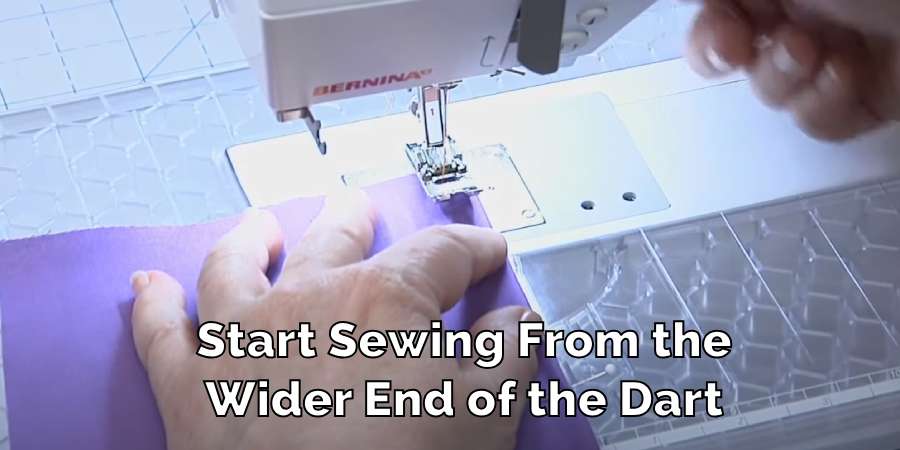
This trick helps stop the fabric from puckering and gives you a nice, smooth finish. When you hit the dart point, don’t backstitch because it might bulk things up. Instead, leave a bit of thread hanging and tie it off by hand, or just run the stitches off the fabric edge before tying.
Clipping the Dart
Sometimes, if your fabric is on the thicker side, you’ll want to clip the dart to cut down on bulk. Just make little snips in the dart allowance, being careful not to go too close to your stitches. If you’ve cut it down, you might want to tidy up the raw edge with a zigzag stitch or a serger to keep it from fraying.
Press the Dart
Last but not least, ironing your dart is super important for a clean look. Press the dart flat first to set your stitches. Then, depending on what your pattern says, you’ll either press the dart to one side or open it up.
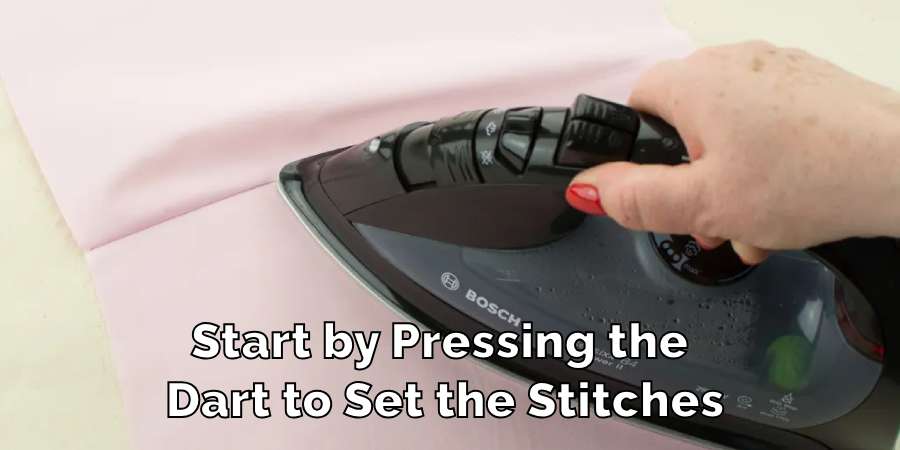
Usually, you press vertical darts towards the garment’s center and horizontal ones down. If your dart is curved, use a tailor’s ham to press it without squashing the fabric’s shape. Be careful not to leave any iron marks on the front of your fabric.
Taking your time with each of these steps is the secret to getting darts that look great and make your garment fit like it was made just for you. It’s a bit like putting together a puzzle – every piece needs to be in the right place for the final picture to come together.
Final Thoughts
As you continue to refine your sewing skills, especially with techniques like sewing darts, remember that each step you take enhances your ability to create beautiful, custom-fit garments. Whether you’re working on a simple project or a complex design, the attention to detail in tasks like dart sewing can make all the difference.
Keep experimenting, learning from each stitch, and don’t hesitate to revisit and refine your techniques as you grow. Your sewing journey is unique, and every project brings new opportunities to apply your skills and creativity. Happy sewing, and may each garment you craft be a wonderful expression of your dedication and passion for sewing!
You may also read – How to Make Darts with Sticky Notes