

Ever thrown a dart, aiming for that perfect bullseye, only to watch it veer off and hit your wall? You’re not the only one. Playing darts is a blast, but it can sometimes mean bad news for your walls. That’s where knowing what to put behind a dart board to protect the wall comes in handy. It’s essential for anyone who loves darts.
In this guide, we’re all about helping you keep your walls in top shape while you enjoy tossing those darts. We’ll walk you through choosing the right materials and how to set up your dartboard properly. We’ve got all the tips and tricks you need to protect your walls and make sure your darts go exactly where you want them to.
Why You Need to Put Something Behind a Dart Board to Protect the Wall
Darts, by their very nature, are sharp and can easily damage walls. Missed throws, which are common even among experienced players, can lead to holes, scuffs, and marks on the wall. This is not just an aesthetic issue repeated impacts can weaken the wall structure over time.
Protecting your wall is not only about maintaining the look of your space but also about preserving its integrity. Additionally, having a dedicated dart area with proper wall protection can enhance your playing experience, making you more confident in your throws without the worry of wall damage.
Tools We Need to Put Behind a Dart Board to Protect the Wall
When setting up a protective backing for your dart board, it’s important to have the right tools and materials on hand. Think of it like preparing for a small DIY project. You don’t need a lot, but the right tools make all the difference. Here’s what you’ll need:
- Measuring Tape: This is your best friend in ensuring that the backing not only fits perfectly behind the dart board but also covers enough wall area to catch any stray darts. Measure twice, so you only have to set up once!
- Level: Have you ever thrown a dart at a crooked board? Not fun, right? A level ensures that your dart board and its backing are perfectly horizontal. This little tool is crucial for a fair and enjoyable game.
- Drill or Hammer: Depending on the type of wall and backing material you choose, you’ll need either a drill or a hammer. If you’re mounting on a harder surface, like concrete or brick, a drill will be necessary. For softer walls, a hammer might do the job just fine.
- Wall Anchors and Screws: These are essential for securing your backing material firmly to the wall, especially if you’re not drilling directly into studs. Wall anchors ensure that the weight of the backing and the dartboard is supported properly, preventing any damage to your wall.
- Dart Board Backing Material: Here’s where you can get creative. Choose from materials like cork, foam, or wood, depending on your preference and style. Cork is great for self-healing and durability, foam is lightweight and easy to work with, and wood offers a classic look and sturdy backing. Consider the look of your room, your budget, and how often you play when picking the material.
Remember, the goal is to create a safe and stylish dart-playing area. Take your time in choosing and installing the right backing. A little effort here means a lot of fun and zero wall repairs in the future. Happy darting!
What To Put Behind A Dart Board To Protect The Wall
When it comes to protecting your walls from darts, you’ve got a bunch of good options. Each one has its perks, and you can pick based on what you need, your style, and the space you’re working with. Here is a more detailed look.
Cork Board
Cork board is a top choice for many dart players, and for good reason. Cork is dense, so it stops darts in their tracks and keeps your walls hole-free. It’s also gentle on your darts, which helps them last longer.
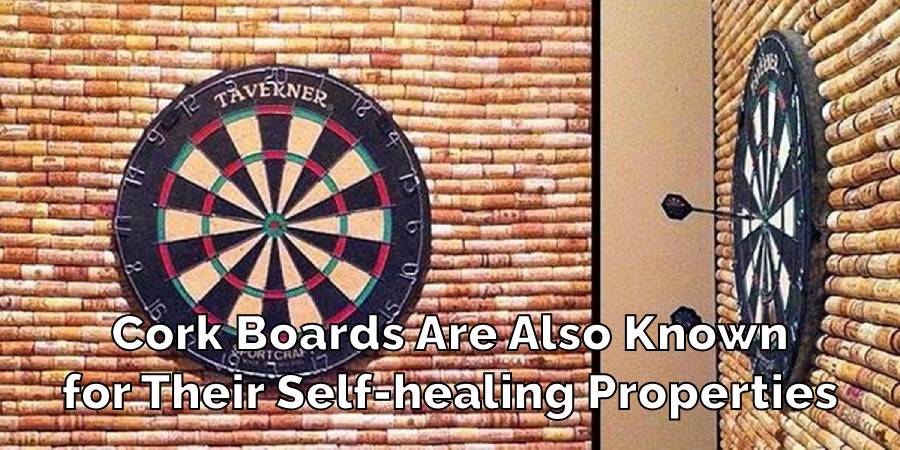
Cork boards can heal themselves from the tiny punctures darts make, which is pretty neat. They’re easy to put up, and if they get too worn out, swapping them out is no hassle. They look natural and can blend well with many room styles.
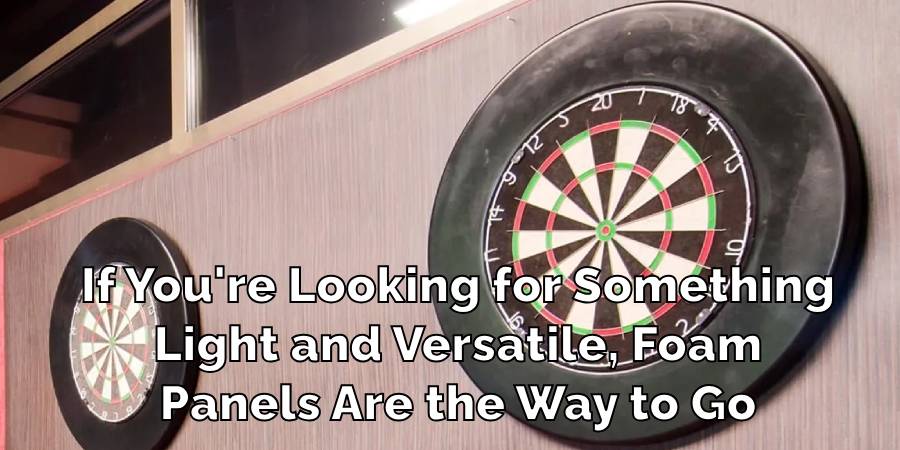
Foam Panels
Foam panels are lightweight and super flexible. You can cut them to fit any size space, which is great if you’re working with a tight or odd-shaped area. They’re good at soaking up the impact from darts, which helps protect your wall. Just a heads up, though, foam might not last as long as some other materials, so you might need to replace it now and then.
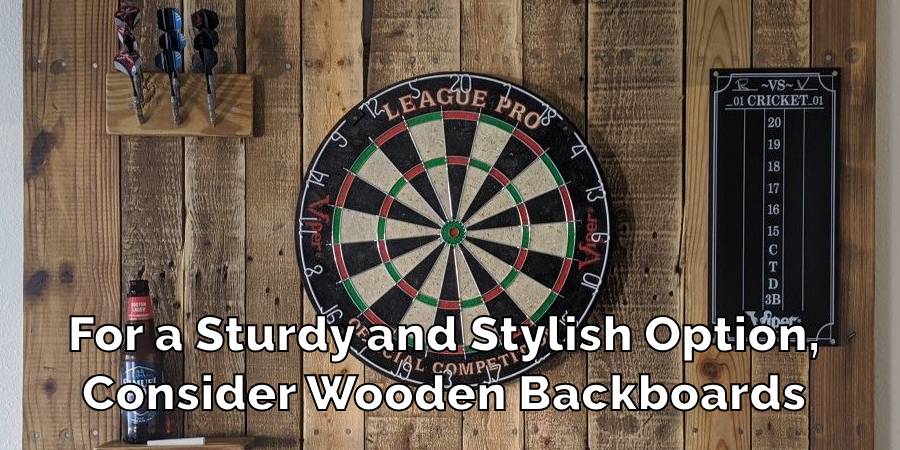
Wooden Backboards
If you’re after something strong and stylish, wooden backboards could be your go-to. They work well if you’re into a classic or rustic look. You can use plywood or particle board, cut it to size, and even paint or varnish it to match your room. Wooden backboards are tough and do a great job of shielding your walls.
Felt or Fabric Covers
Want to add a bit of flair and reduce noise? Cover your backing material with a layer of felt or fabric. This not only looks good but also softens the sound of darts hitting the board. Just make sure the fabric is stretched tight and secured well so it doesn’t interfere with your game.
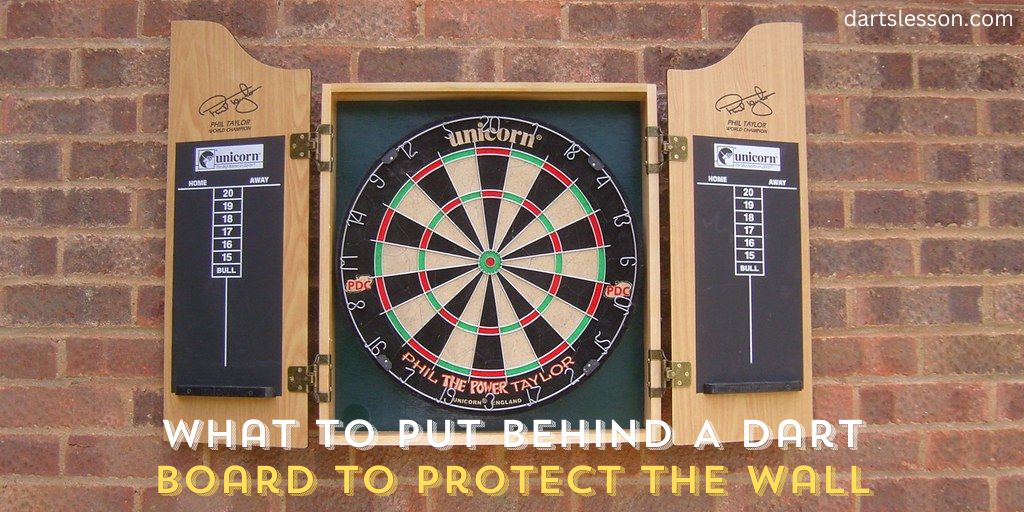
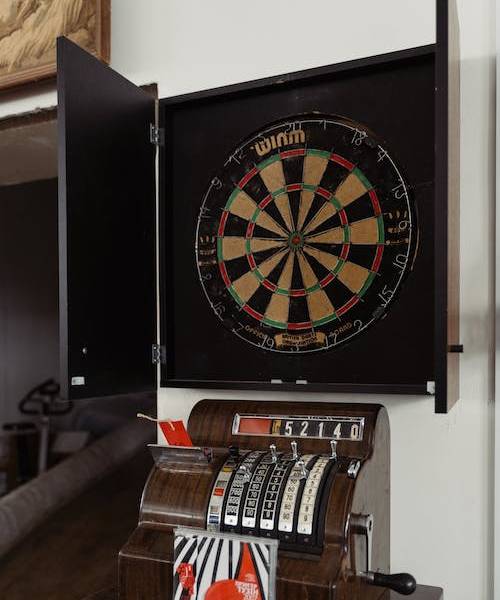
Commercial Dart Board Cabinets
If you like everything neat, dartboard cabinets are worth a look. They often come with built-in protection for your wall and have spots to store your darts and keep score. Cabinets range from simple to fancy, so you can find one that fits the look of your room.
So, there you have it. Whether you’re drawn to the natural charm of cork, the easy-going nature of foam, the strength of wood, the sophistication of fabric, or the convenience of a cabinet, there’s an option out there for you. Consider how you play, what your room looks like, and your budget. With the right pick, you can keep your walls safe and add a personal touch to your darts area.
DIY Solutions and Creative Ideas
We’re talking about giving your dartboard area a creative overhaul, protecting your walls, and making the whole setup uniquely yours. And guess what? This journey includes everything from vintage records to the cozy feel of denim, and yes, even the history of darts!
Creative Backdrops: More Than Just Protection
Picture this: your dart zipping towards the board, set against a vibrant array of old vinyl records. This setup isn’t just about catching those off-course darts; it’s a visually striking piece that kicks off conversations and adds an energetic vibe to every game. For those with a knack for crafts, assembling a mosaic of broken tiles or mirrors can turn your dart area into a reflective masterpiece, bouncing light around and adding a dynamic touch to your throws.
Incorporating Dart Cabinets and Surrounds
Let’s talk about dart cabinets and surrounds. These aren’t just functional pieces; they’re opportunities for creativity. A dart cabinet, with its classic look, not only stores your extra darts and dart tips but also turns your setup into a darting landmark in your home. And when it comes to dart surrounds, think of them as a canvas for your imagination. Wrapping one in fabric or denim not only softens the impact of your throws but also brings a snug and inviting atmosphere to the game area.
Protecting Your Space: From Dart Mats to Backboards
Ever thought about the floor beneath your feet while playing darts? Dart mats not only define your dart track, offering a steady surface for darts, but they also protect your floors from potential damage—think missed darts that take a dive. And then there’s the dart backboard, an unsung hero. Beyond its protective role, it’s a prime candidate for a DIY makeover. Imagine a backboard covered in pages from old books or a patchwork of cork trivets, each piece adding its texture and story to your dart setup.
Gathering Materials: A Treasure Hunt
Kicking off your DIY project starts with gathering materials—maybe it’s time to raid those local thrift shops or yard sales. Whether it’s for a dartboard wall protector, a dartboard backboard, or even unique dartboard wall protectors, choose items that reflect your style and meet your needs for durability and impact absorption. Don’t forget, that measuring your space is key; ensuring your protective elements are adequately sized is crucial for catching those stray darts.
Bringing Your Vision to Life
Once you’ve rounded up your materials, laying them out and planning your design is where the fun really begins. For heavier items, make sure you’ve got the right mounting gear to secure them safely to your wall. And hey, if tools aren’t exactly your thing, there’s no harm in calling in a favor from a crafty buddy to help bring your vision to life.
A Personal Touch: Your Signature Dart Area
The beauty of going DIY is the personal stamp you get to put on your space. Whether you lean towards the sleek, modern appeal of a metal dart board setup or the warm, rustic charm of upcycled wood and fabric, the aim is to make it distinctly yours. It’s about creating a spot that’s not just for aiming darts but also a reflection of your creativity and interests.
Game On: Enjoy Your Revamped Space
With your new, upcycled dart protection in place, you’re all set for countless hours of fun, minus the worry about your walls. So, invite over your pals, grab those darts (don’t forget those extra darts), and revel in the added bonus of playing in a space that’s truly one-of-a-kind. Who knows, maybe the backdrop of your dart area might just inspire your next perfect score.
Parting Shot
Remember, folks, the best scores are the ones that leave a mark on the scoreboard, not your wall. Here’s to creating a dart-playing space that’s as unique as your throw. Happy darting!
Precaution While Putting Something Behind a Dart Board to Protect the Wall
There are some key precautions to keep in mind to make sure everything works as it should. Let’s break it down into simple steps so you can do this with confidence:
- Measuring Your Space: This is a crucial first step. You need to measure the area behind the dart board carefully. Why? Because you want to make sure the backing is big enough to catch any off-target darts. It’s not just about covering the area directly behind the dartboard, but also around it. So, grab a measuring tape and make a note of the height and width you’ll need. It’s better to have a bit more coverage than not enough.
- Securing the Backing Firmly: Once you’ve got your backing material cut to size, the next big thing is to fix it securely to the wall. If it’s wobbly or shifts while you play, it won’t do its job properly. Use suitable screws, wall anchors, or adhesive (depending on the material and your wall type) to attach it firmly. If you’re not handy with tools, don’t hesitate to ask for help or even get a professional. A well-secured backing not only protects your wall but also ensures a safe playing environment.
- Regular Inspection and Maintenance: Just like anything else in your home, your dart board backing needs a little love and care. Over time, it will wear out – darts are sharp, after all! Check the backing regularly for signs of wear and tear. If you see areas where darts have significantly damaged the material, it might be time to replace it. This is especially true for softer materials like foam or cork. Keeping an eye on the condition of your backing and maintaining it well means your wall stays protected for years to come.
By following these simple precautions, you’ll not only keep your wall in good shape, but you’ll also ensure that your dart-playing experience is both enjoyable and safe. So, measure carefully, secure firmly, and keep an eye on wear and tear – your walls will thank you!
FAQ’s
What is the Best Material for Behind a Dart Board?
Choosing the best material for behind your dartboard depends on a few things like durability, aesthetics, and your budget.
Corkboard is often considered the top choice because it’s dense, self-healing, and looks natural. Foam panels are great for custom fits and are budget-friendly, while wooden backboards offer a sturdy and classic look. Ultimately, the best material is one that suits your needs and blends well with your playing space.
How Do You Soundproof a Dart Board?
Soundproofing a dart board is all about reducing the ‘thud’ noise when darts hit. Foam is a good sound absorber, so a thick foam panel behind the board can help.
Additionally, covering the backboard with a layer of felt or acoustic fabric can further dampen the sound. Make sure the dartboard and its backing are mounted securely, as a loose setup can cause more noise.
Can Soft-tip Darts Damage Walls?
Yes, soft-tip darts can still damage walls, especially if you miss the board. While they’re less likely to leave deep holes compared to steel-tip darts, they can still cause scuffs and marks. It’s always a good idea to have a protective backing, regardless of the type of darts you use.
What is the Correct Height to Hang a Dartboard?
The standard height for hanging a dartboard, as specified by professional dart organizations, is 5 feet 8 inches from the floor to the center of the bullseye. This height is considered optimal for fair play and applies to both steel-tip and soft-tip darts.
Is Foam Board Soundproof?
Foam boards can be effective for soundproofing to some extent. It’s great for absorbing sound, which reduces the noise of darts hitting the board.
However, it’s not completely soundproof in the same way specialized acoustic materials are. If you’re looking for significant sound reduction, you may want to try additional soundproofing options.
Conclusion
Protecting your wall with the right backing for your dart board is more than just a practical necessity it’s an enhancement to your dart-playing experience. This article has explored what to put behind a dart board to protect the wall.
Whether you choose cork, foam, wood, or a commercial cabinet, the key is to ensure your walls remain unscathed, and your focus stays on hitting that perfect score. Remember, a good setup not only saves your wall but also boosts your game. So, set up your dartboard with care, and let the good times roll!